

If you’re developing web applications, an HTTP client is one of the essential tools you’ll need. This tool allows you to send HTTP requests and receive responses from a web server. One of the best HTTP clients available is the one built into IntelliJ IDEA. However, it’s important to note that this tool is only available in the paid version of IntelliJ IDEA.
Introduction to the Inbuilt HTTP Client in IntelliJ IDEA
The inbuilt HTTP client in IntelliJ IDEA is a powerful tool that allows you to test your RESTful web services. It’s built into the IDE, so you don’t need to install additional software. It’s also straightforward to use, and it has many features that make it an excellent choice for web developers.
Recommended Naming and Packaging
A recommended approach for packaging is to create a single HTTP file for each Rest Controller class, as shown in the example below. Environment variable files can also be placed in the same folder. It is worth noting that password files should be kept private to prevent them from being pushed to the repository. Sample file contents will be shown later in the article to illustrate this concept.
project-folder/
 - http-client/
  - http-client.private.env.json
  - http-client.public.env.json
  - UserController.http
  - BookController.http
 - src/
Using Host and env.json files with two environments
Before we dive into the examples, let’s set up our environment. We’ll use the {{host}} placeholder in our requests and store the host information in an env.json file. This file will contain two environments: dev and prod. Here’s an example of what the env.json file might look like:
{
  "dev": {
 "host": "http://localhost:8080"
  },
  "prod": {
 "host": "https://api.example.com"
  }
}
Sending HTTP Requests with IntelliJ IDEA
Sending HTTP Requests
Let’s start with a simple example. Suppose we want to get a list of users from our web service. Here’s how we can do it with IntelliJ IDEA’s HTTP client.
We first need an HTTP file from which our IDE can parse and make calls. Inside this file, we can paste the configuration below:
GET http://{{host}}/api/usersHere is my example:
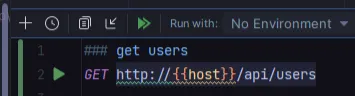
As you can see in the upper right corner, we do not have the environment selected.
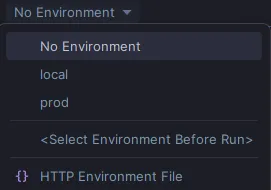
We can click it and choose which server we want to call.
After choosing one, there is a green triangle on the left side of our call.
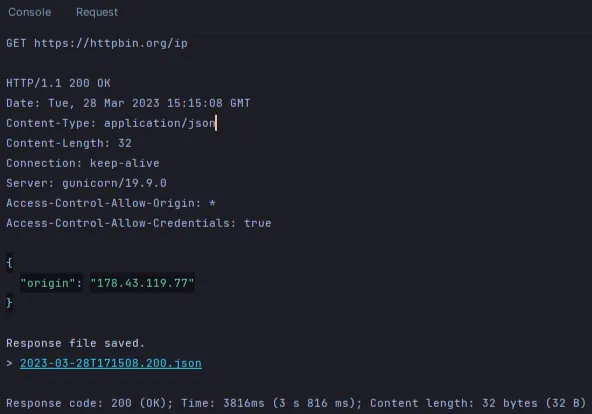
If we click, our call will be made. IntelliJ IDEA will display the response in the HTTP client window when we send this request. We can also see the request and response headers and body.
Example response from different endpoints below:
Sending a POST Request with a JSON Body
Let’s say we want to add a new user to our web service. We can do this with a POST request that includes a JSON body. Here’s an example request:
POST http://{{host}}/api/users
Content-Type: application/json


{
 "name": "John Doe",
 "email": "[email protected]"
}
Again, IntelliJ IDEA will display the response in the HTTP client window. You can also see the request and response headers and body.
Sending a POST Request with a Multipart File
Sometimes you need to send files with your requests. For example, if you’re building a file upload feature for your web service. Here’s an example of how to do this with IntelliJ IDEA’s HTTP client:
POST http://{{host}}/api/files/upload
Content-Type: multipart/form-data; boundary=boundary

--boundary
Content-Disposition: form-data; name="file"; filename="input.jpg"
Content-Type: image/jpeg

// The 'funny_image.jpg' file will be uploaded
// Below is a relative path to the file
// from your working project
< ../../../funny_image.jpg
--boundary
Saving and Reusing JWT Tokens
Our web service uses JSON Web Tokens (JWTs) for authentication. We can use IntelliJ IDEA’s HTTP client to save the JWT token from the response of one request and reuse it in subsequent requests. Here’s an example:
POST  http://{{host}}/api/login
Content-Type: application/json

{
"username": "john.doe"
}

> {%
 client.global.set("auth_token", response.body.idToken);
 client.log("Logging Bearer Token.");
 client.log("Bearer " + response.body.idToken);
%}
As you can see, after json body, we have an additional part that saves the token from the response.
client.global.set("auth_token", response.body.idToken);We use this method to save the token in the json response body field idToken to the global value auth_token.
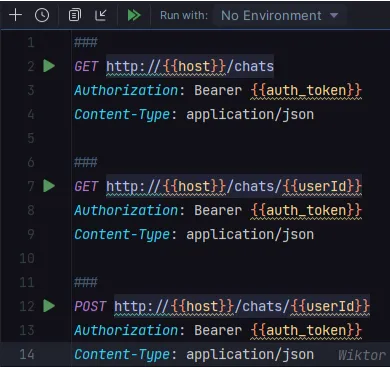
To use the saved JWT token, we simply need to include it in the “Authorization” header of our requests. Here’s an example of how to do this:
GET {{host}}/api/users
Authorization: Bearer {{auth_token}}
Using variables in requests
We can extend our environment variable file. These fields can be used as endpoint path and method body variables. Here is an example:
{
  "dev": {
 "host": "http://localhost:8080",
  "email": "[email protected]",
 "password": "wd2%(sahw",
  },
  "prod": {
 "host": "https://api.example.com",
"email": "[email protected]",
 "password": "Id@(plv#",
  }
}
And we can use it like this:
POST http://{{host}}/users

{
 "email": "{{email}}",
 "password": "{{password}}"
}
Tests
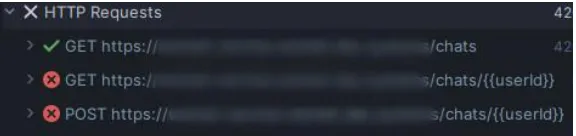
Running all requests from the file
If you recall the examples mentioned above, you may remember that besides the green triangles next to each request, there is also a green double triangle at the top of the file. This can be used to run all requests in the file at once. It is often used to test the endpoints created within a Rest Controller.
Other helpful features
GraphQL
IntelliJ’s HTTP client also supports GraphQL queries.
### Simple Query over HTTP
// We just write a GraphQL query in the request body
GRAPHQL http://{{$exampleServer}}/graphql

query {
  getUser(userName: "My Favorite User") {
 name
 comments {
   text
   by
 }
  }
}
Websockets
Sending messages to the server from the Services tool window is possible.
WEBSOCKET ws://{{$exampleServer}}/wsIt is possible to specify client messages in the request body. Use ‘===’ to separate messages. Add ‘=== wait-for-server’ above a message to send after receiving a server response. To wait for N responses, add ‘=== wait-for-server’ N times.
WEBSOCKET ws://{{$exampleServer}}/ws
Content-Type: application/json // We use it for highlighting

===
{
  "message": "Hello, server!",
  "repeat": 3
}
=== wait-for-server
=== wait-for-server
{
  "message": "We send this message...",
  "repeat": 0
}
===
{
  "message": "And this message together",
  "repeat": 1
}
Mix of GraphQL with Websockets
If the server supports WebSocket for GraphQL, we can use it for sending requests via WebSocket.
GRAPHQL ws://{{$exampleServer}}/graphql-ws

mutation creatingNewComment($text: String) {
  newComment(userName: "JetBrains user", text: $text) {
 by
 text
  }
}

{
  "text": "GraphQL over WebSocket!"
}
Fast copying to cURL
We can quickly copy each call to cURL. Also, if you paste your cURL query to an HTTP file, it will be automatically converted.
Generate requests by hand
IntelliJ can help you with generating your call.
Generate requests based on existing controllers
In IntelliJ, open the Endpoints tab. This tab should list all endpoint you have in your project. Now you can filter by arbitrary parameters, select all endpoints, and generate requests.

Considering the practical examples above, you can see how the built-in HTTP client works in Kotlin. Follow the link to find more info about this tool: